Note: This is mainly used whenever I decide to change or completely reset my MacBook. Feel free to use parts of it or the entire thing and let me know if there’s anything I’m missing.
Using a personal or work iCloud account
I tend to use a personal iCloud account for my work computer. The reason is that I often also use the device for personal stuff, and most work-related things can be controlled using a work profile setup in Chrome (more on that later).
Installing my preferred browser
I'm all-in on the "Google wagon" so using Chrome makes a lot of sense:
Works great with Docs, Drive sync, etc.
Has extensions for password manager (I'm using LastPass)
Makes it easy to switch between work and personal profiles
Adding a bit of security in the browser
I like to set these settings up because they force me to use my password manager instead of letting Google (or Apple Keychain) do the work. First up, I open this URL to configure the cookie settings:
chrome://settings/cookiesFrom here, enable "Clear cookies and site data when you quit Chrome". This ensures that whenever you quit Chrome (CMD+Q) you’re logged out of all sites. In situations where your Mac is stolen, this feature would save your ass (part 1). Second, I open this URL in the browser:
chrome://settings/passwordsAnd disable the first two options: "Offer to save passwords" and "Auto Sign-in". Allowing this would store your passwords in Chrome, which would make it pretty damn easy for intruders to access them. Extensions are the bread and butter of the Chrome browser.
Installing browser extensions
Here are the browser extensions I typically install and configure to optimize my workflow:
LastPass
I store all my passwords in my Password Manager. I use LastPass privately and most of the time it works great.
Using a Password Manager is generally annoying, but I’d rather go through the hassle of logging in with LastPass and two-factor authentication every time than see all my stuff get stolen or ruined.
AdBlocker
I hate ads and have gotten really used to using this adblocker. Works without you noticing it and really make it more pleasant to just browse the web. Especially if you watch a lot of YouTube videos.
JSON View
If you’re ever previewing JSON files in your browser, this extension goes through the hassle of formatting and makes it easy to read.
Also an extension I only turn on when needed. Other than this one, I also use https://jsonlint.com/ to validate JSON formatting.
Grammarly
I'm Danish, but I typically write most things (including this) in English. Grammarly is great at spotting small spelling mistakes or wrong use of words, etc.
When writing my thesis, I created separate documents inside the Grammarly application (seemed like it detected more errors that way).
But for smaller docs like this one, having the extension activated inside Google Docs (and the browser in general) does the job well.
Setting up the optimal System Preferences on Mac
This section is more about the general use of your Mac. We'll take a look at:
Notification settings
Trackpad settings
Keyboard settings
Color settings
Dock & menu bar settings
Notification setttings
I have pretty much all notifications turned off. Again, this is likely something you wouldn’t notice the need for if you haven’t tried it before. But if you're using something like the Pomodoro method, you can always check these various things between sessions.
Slack and Messages have that badge icon indicating new messages, but I mostly hide the dock bar so that I only notice new messages whenever actively looking for them.
Trackpad settings
Most often I use a Bluetooth mouse, but whenever I take my MacBook somewhere, these are the settings I have set up for the trackpad:
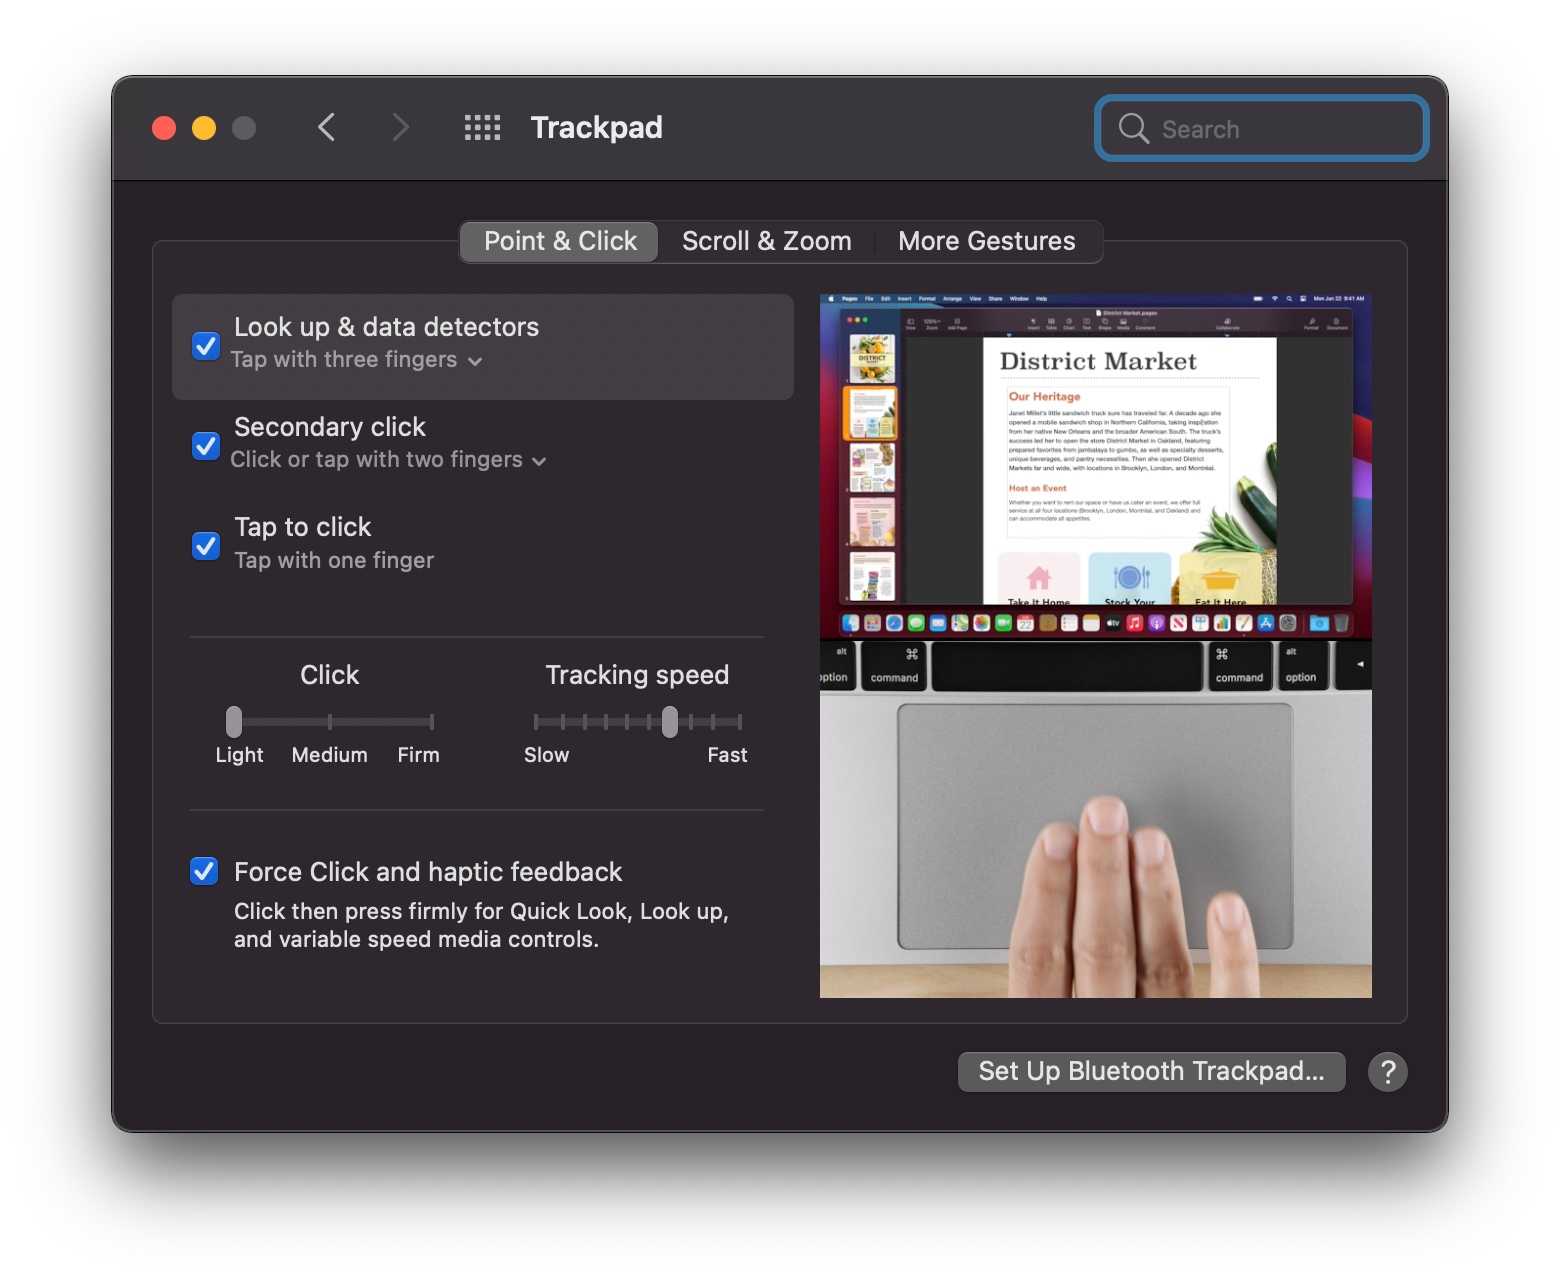
The most noticeable things here are:
Secondary Click with two fingers
Click threshold set to light
Tracking Speed set somewhere above average
Under the "Scroll and Zoom" tab I enable Smart Zoom by "double-tapping with two fingers"
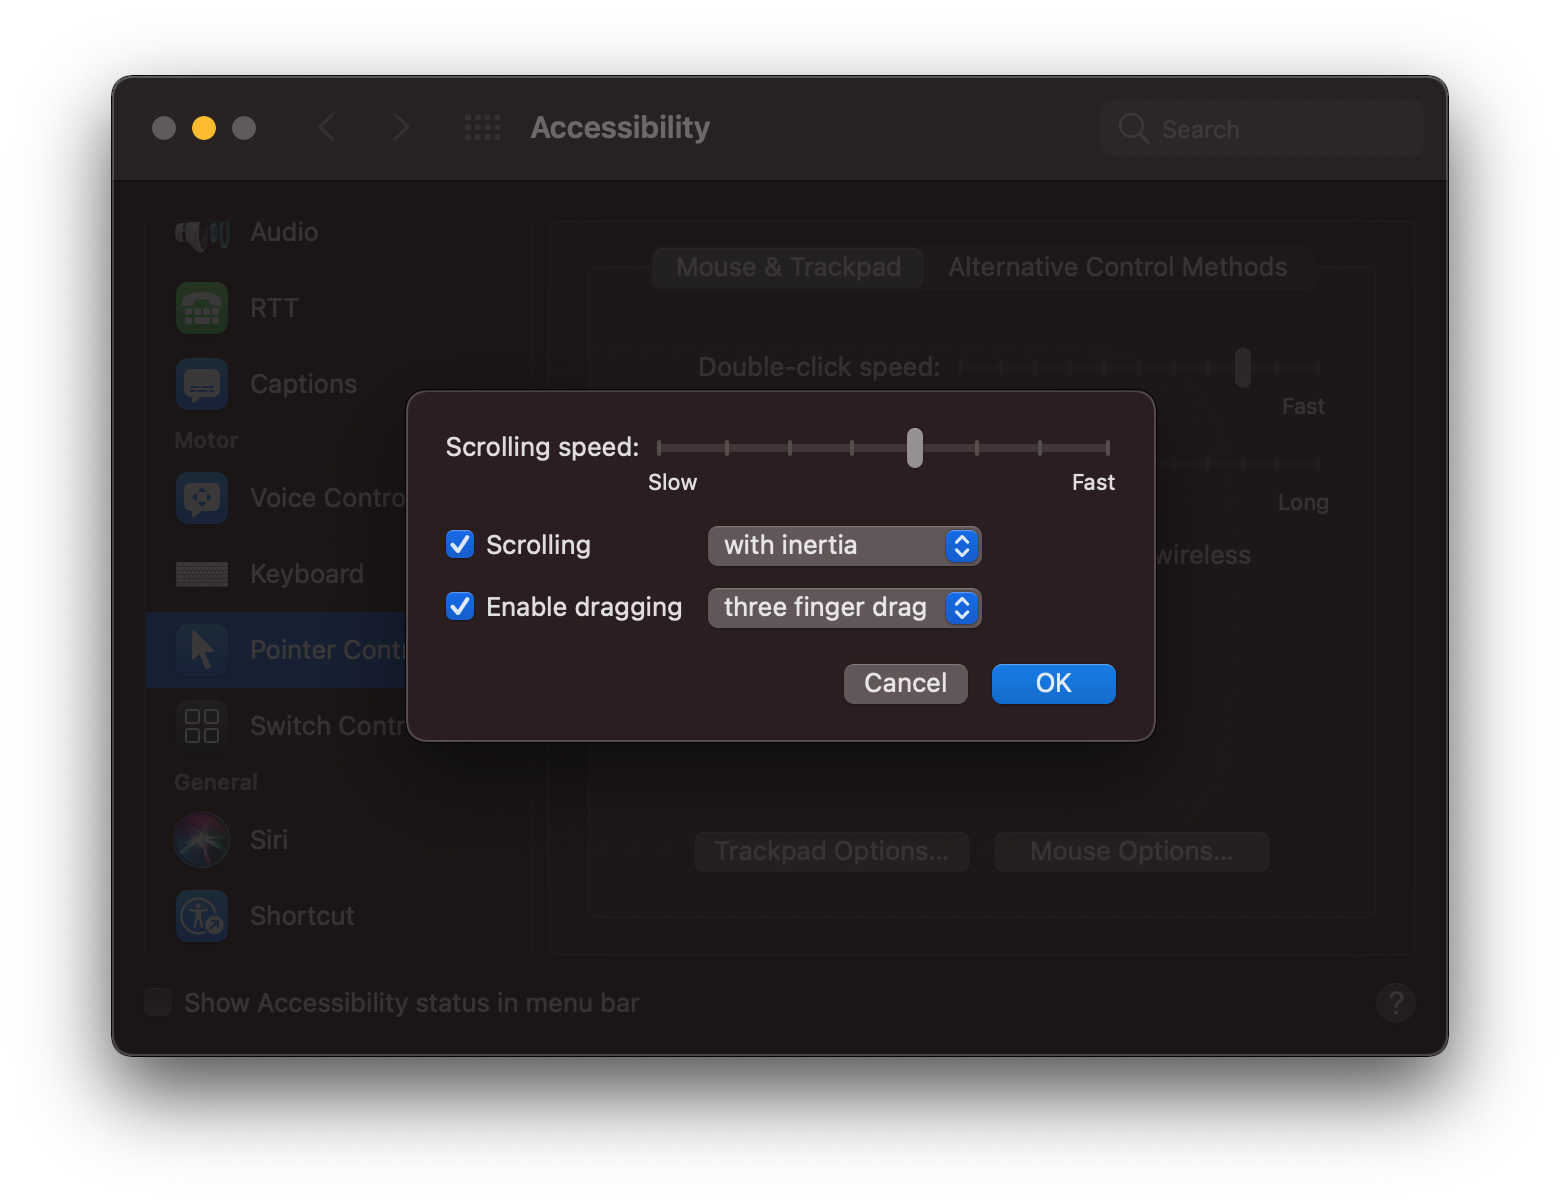
Now, aside from the screenshot above, here’s the one single thing I always set up for my trackpad: the ability to drag items with three fingers. Having to click and drag has always been a mess for me, so I was super excited when I discovered this feature.
To set up dragging with three fingers go to:
System Preferences
Accessibility
Pointer Control
Trackpad Options
Enable Dragging
Three-finger drag
Keyboard settings
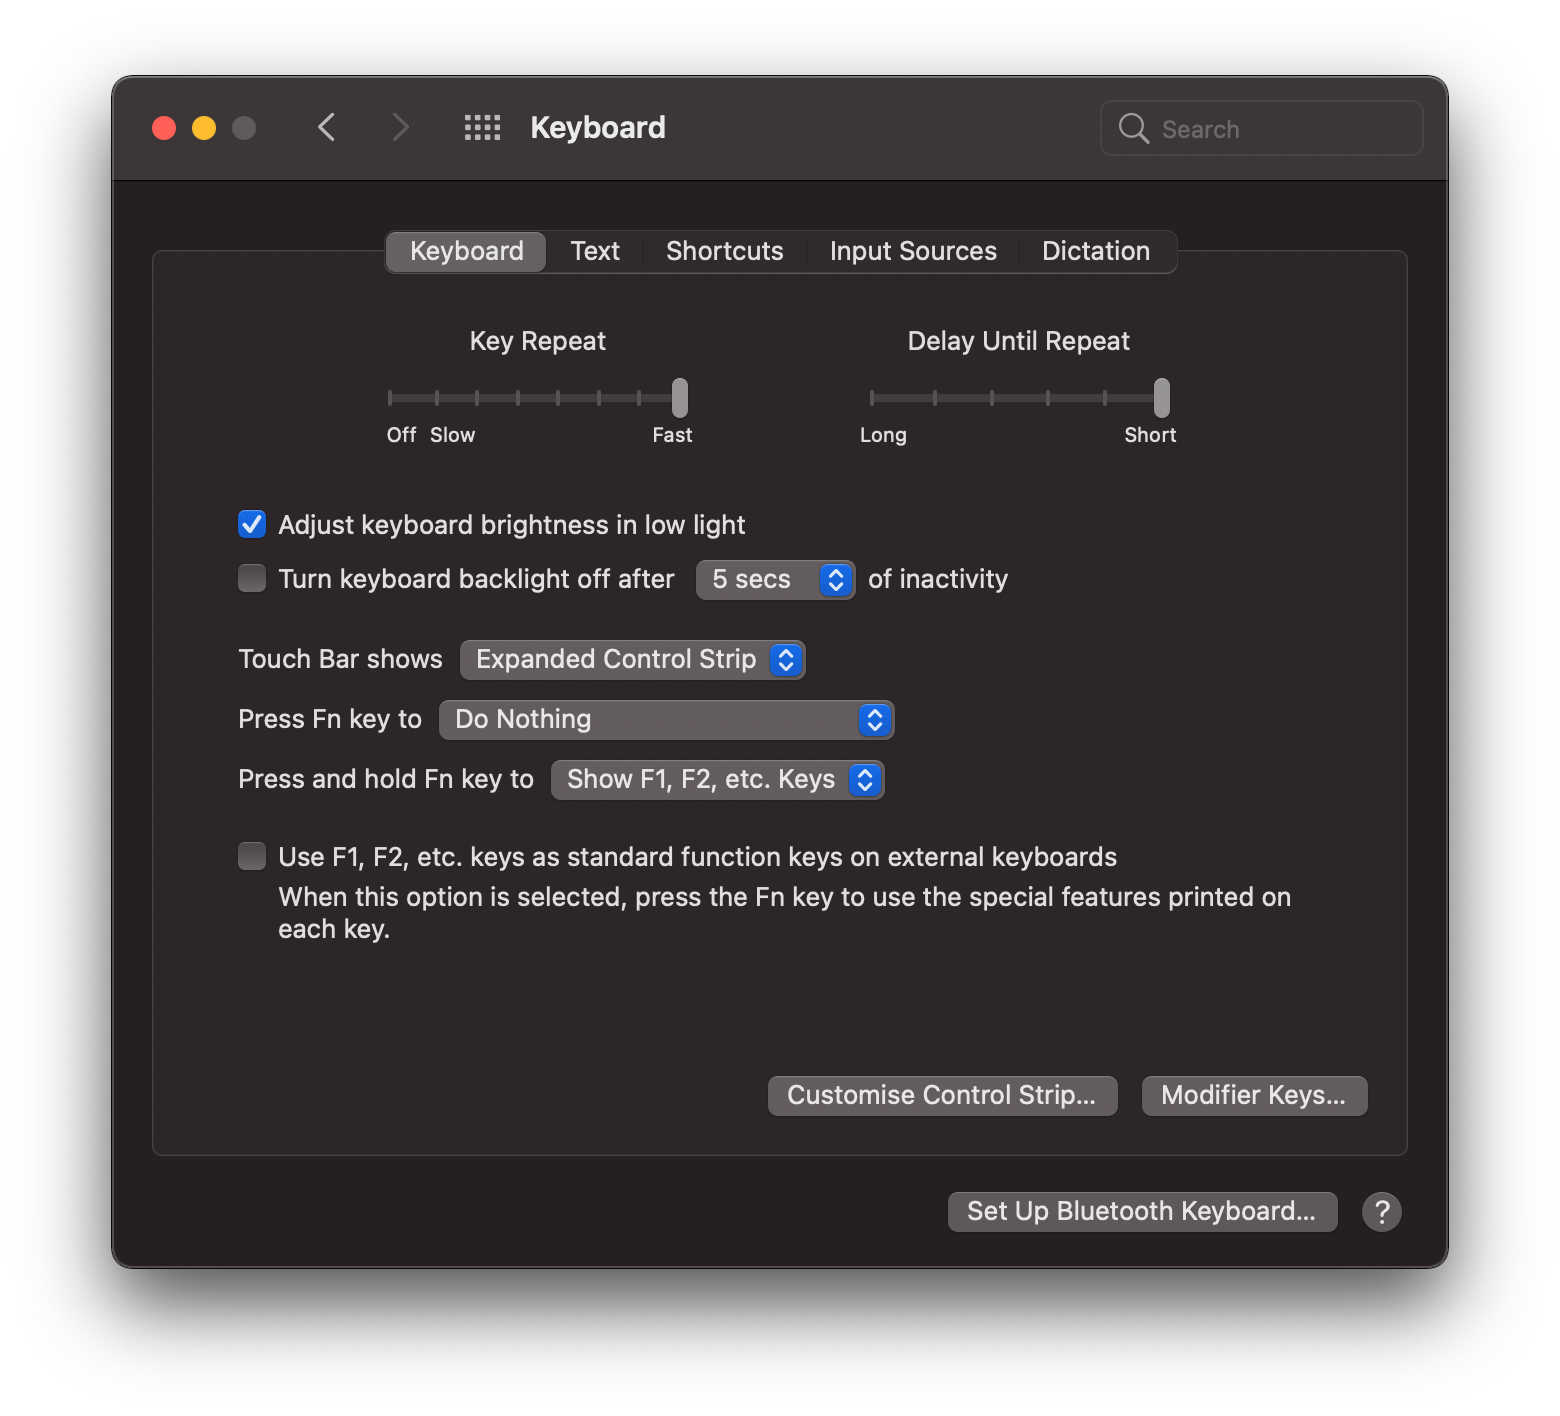
For the keyboard, there’s a bit more configuration to be done. Here are the first items to configure:
Key Repeat = Fast (enables much faster typing but more importantly, deletion)
Delay Until Repeat = Short (ensures that your deletion process doesn’t have to “wait” before deleting. Major game-changer)
Touch Bar shows = Expanded Control Strip (restores the old keys from my MacBook that didn’t have the touch bar. I really haven’t found a proper use case for the touch bar yet and hate when having to press two keys to dim the lights)
Switch between windows of the same application
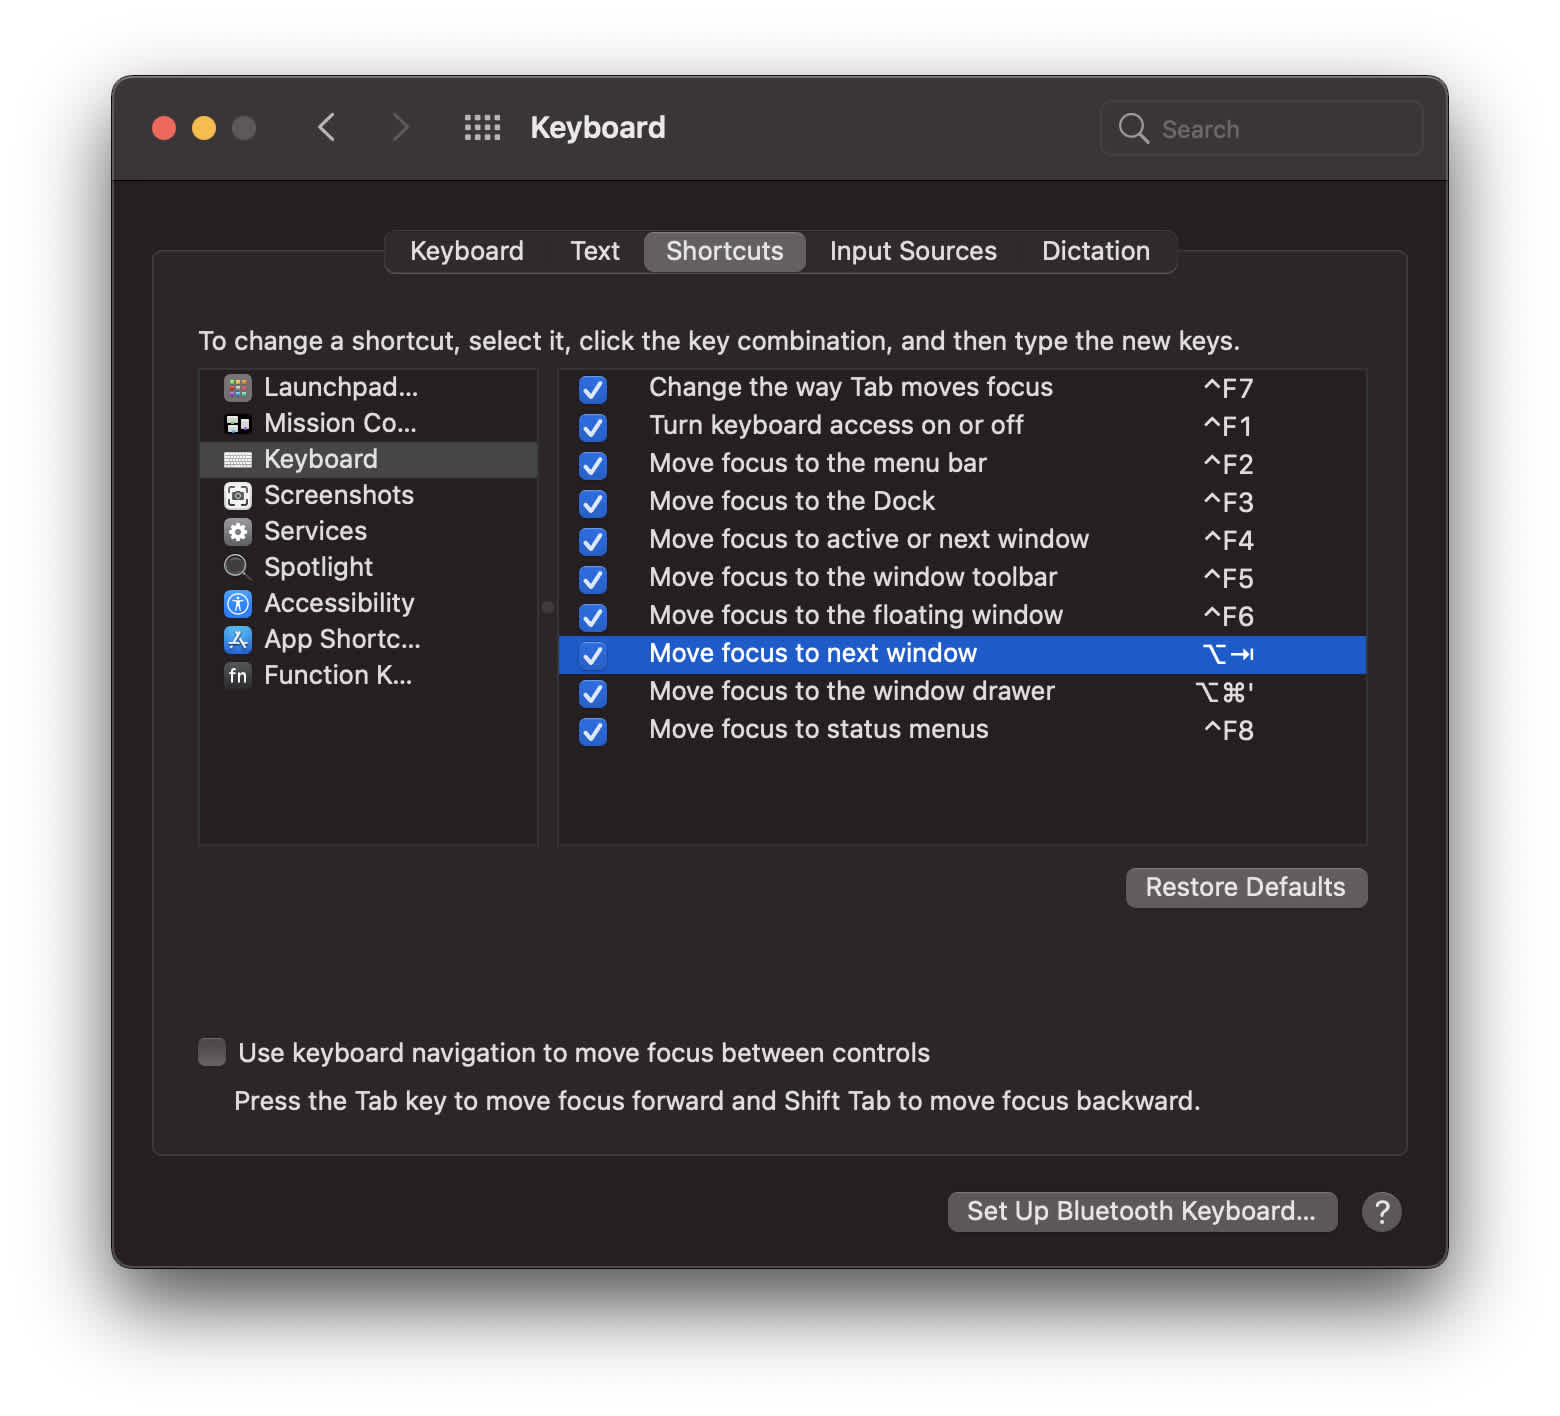
The next major thing is this highlighted shortcut. Those times when I have multiple Chrome or Finder windows open, switching between those can be a pain in the ass. This shortcut makes it extremely easy.
Automatically saving screenshots in a folder
Taking screenshots is easy on a mac, and so is getting a really messy desktop. To prevent that, I always put my screenshots (the ones I don’t only store in the clipboard) in a folder on the desktop. Pres "CMD+SPACE", search for the terminal, open it, and "COPY+PASTE" the following code into the terminal (include a space after the code below)
defaults write com.apple.screencapture locationBefore pressing enter, create a folder on your Desktop and drag it onto the Terminal. This inserts the path to that folder. Press Enter and you’ve now changed how screenshots are saved. You should end up with something similar to this:
defaults write com.apple.screencapture location /Users/lasseravn/Desktop/Screenshots Color settings
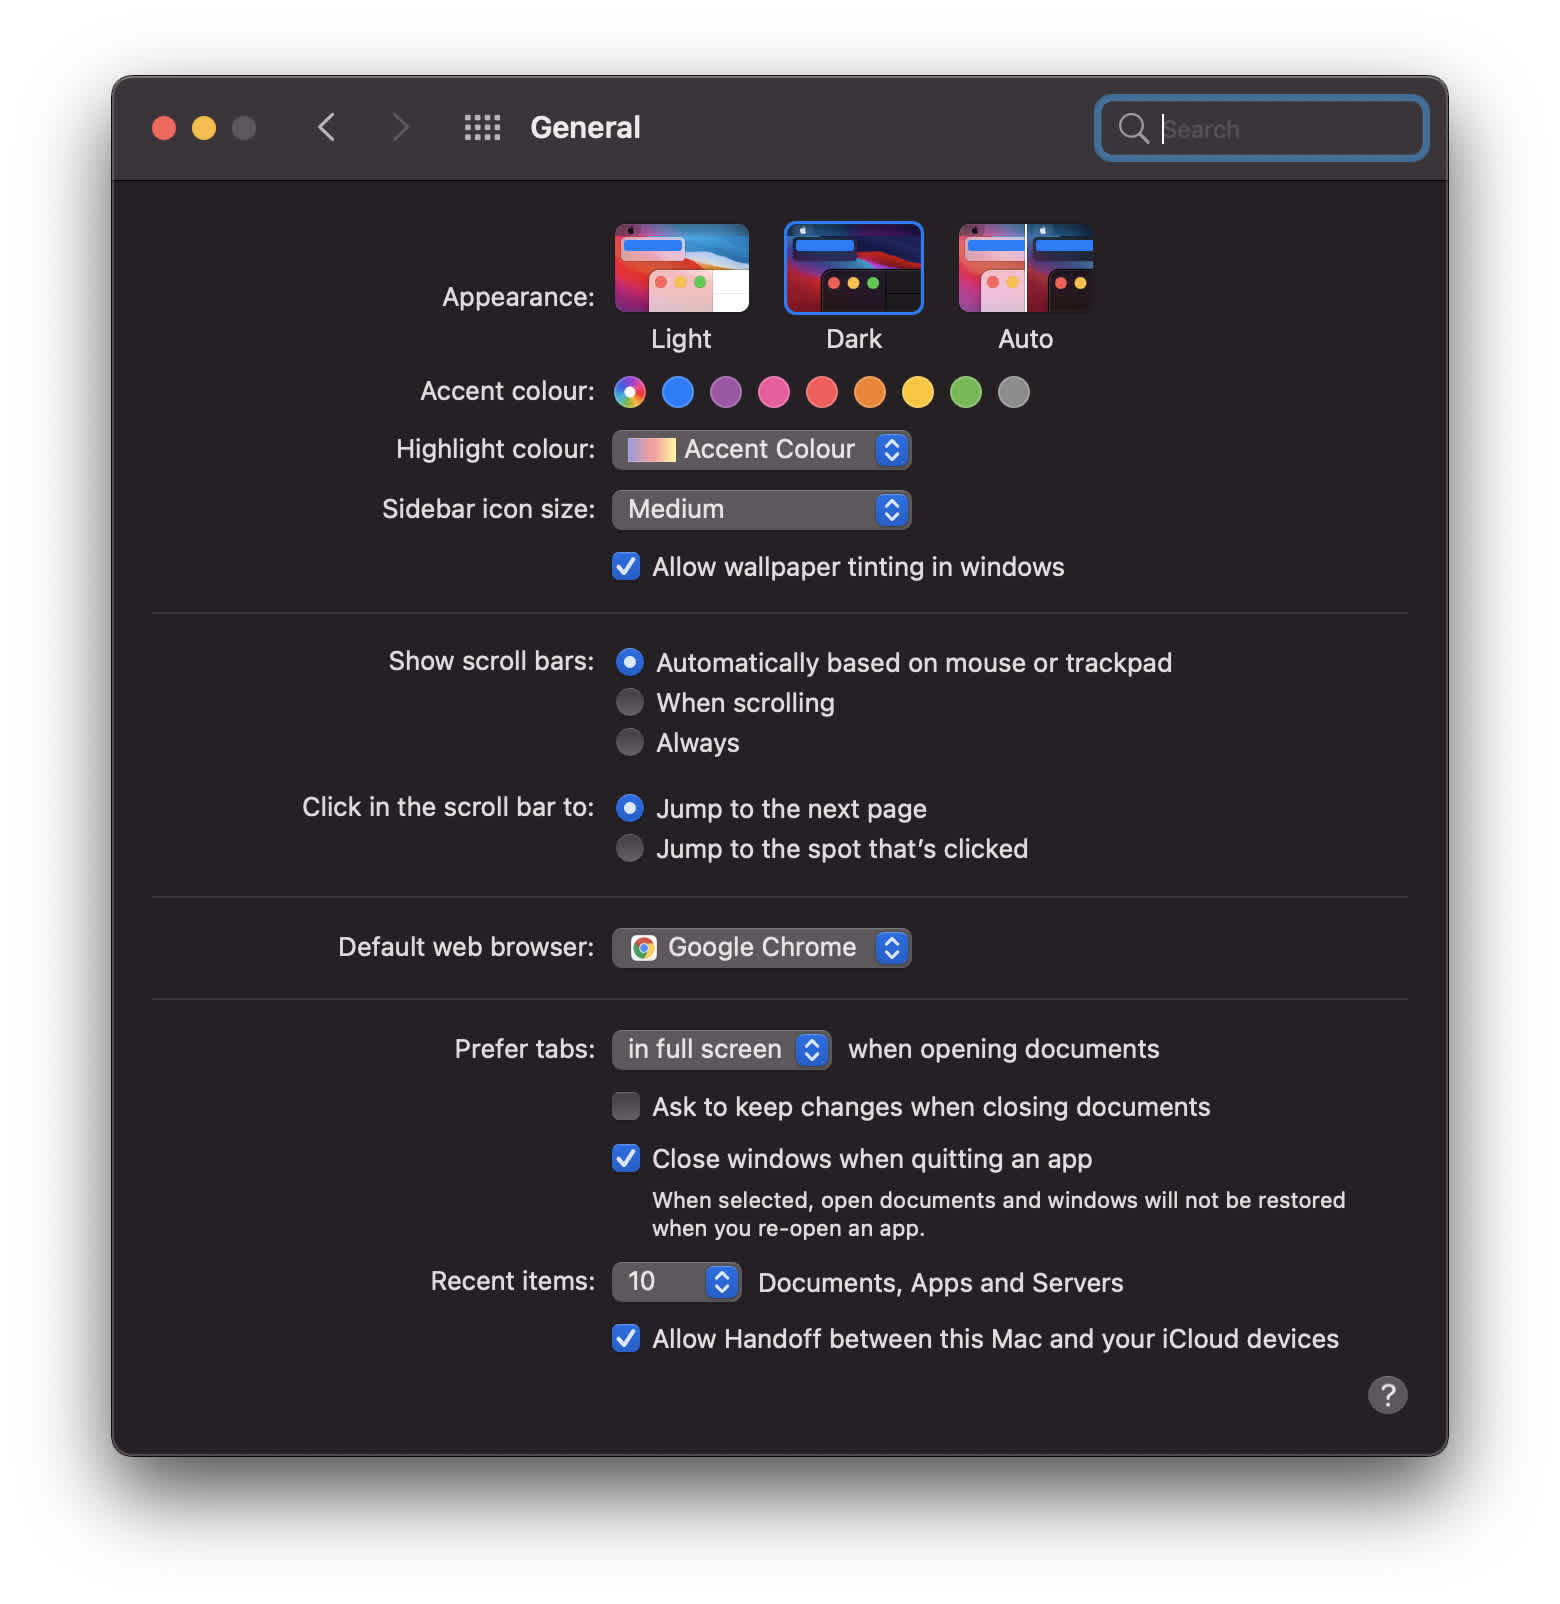
Spending a lot of time in front of the monitor, both in the early mornings and late nights, I think the dark mode is essential. I use this alongside the application "Flux" which turns down the "blue light" from the monitor as I get closer to bedtime.
Dock & menu bar settings
Here are the things I like to change with the dock and menu bar:
Show Bluetooth settings in the menu bar
Show sound settings in the menu bar
Remove most useless applications from the dock
Automatically hide the dock
Make the dock a lot smaller than standard
Other settings
Showing the path in Finder windows
Whenever you open op a Finder window, I like to keep an eye on the current path I'm in. An easy way to do this is by enabling the path at the bottom of the window by pressing "CMD+OPTION+P".
If you'd like to hide the path again, you can use the same command.
Installing useful Mac applications
The second part of this post is about the applications I typically install. I don’t use a lot of them, but I use the ones I have a lot.
Slack
I use slack for work and personal projects. I very rarely email anyone and if I do, then it's mostly because they emailed me first.
Spectacle
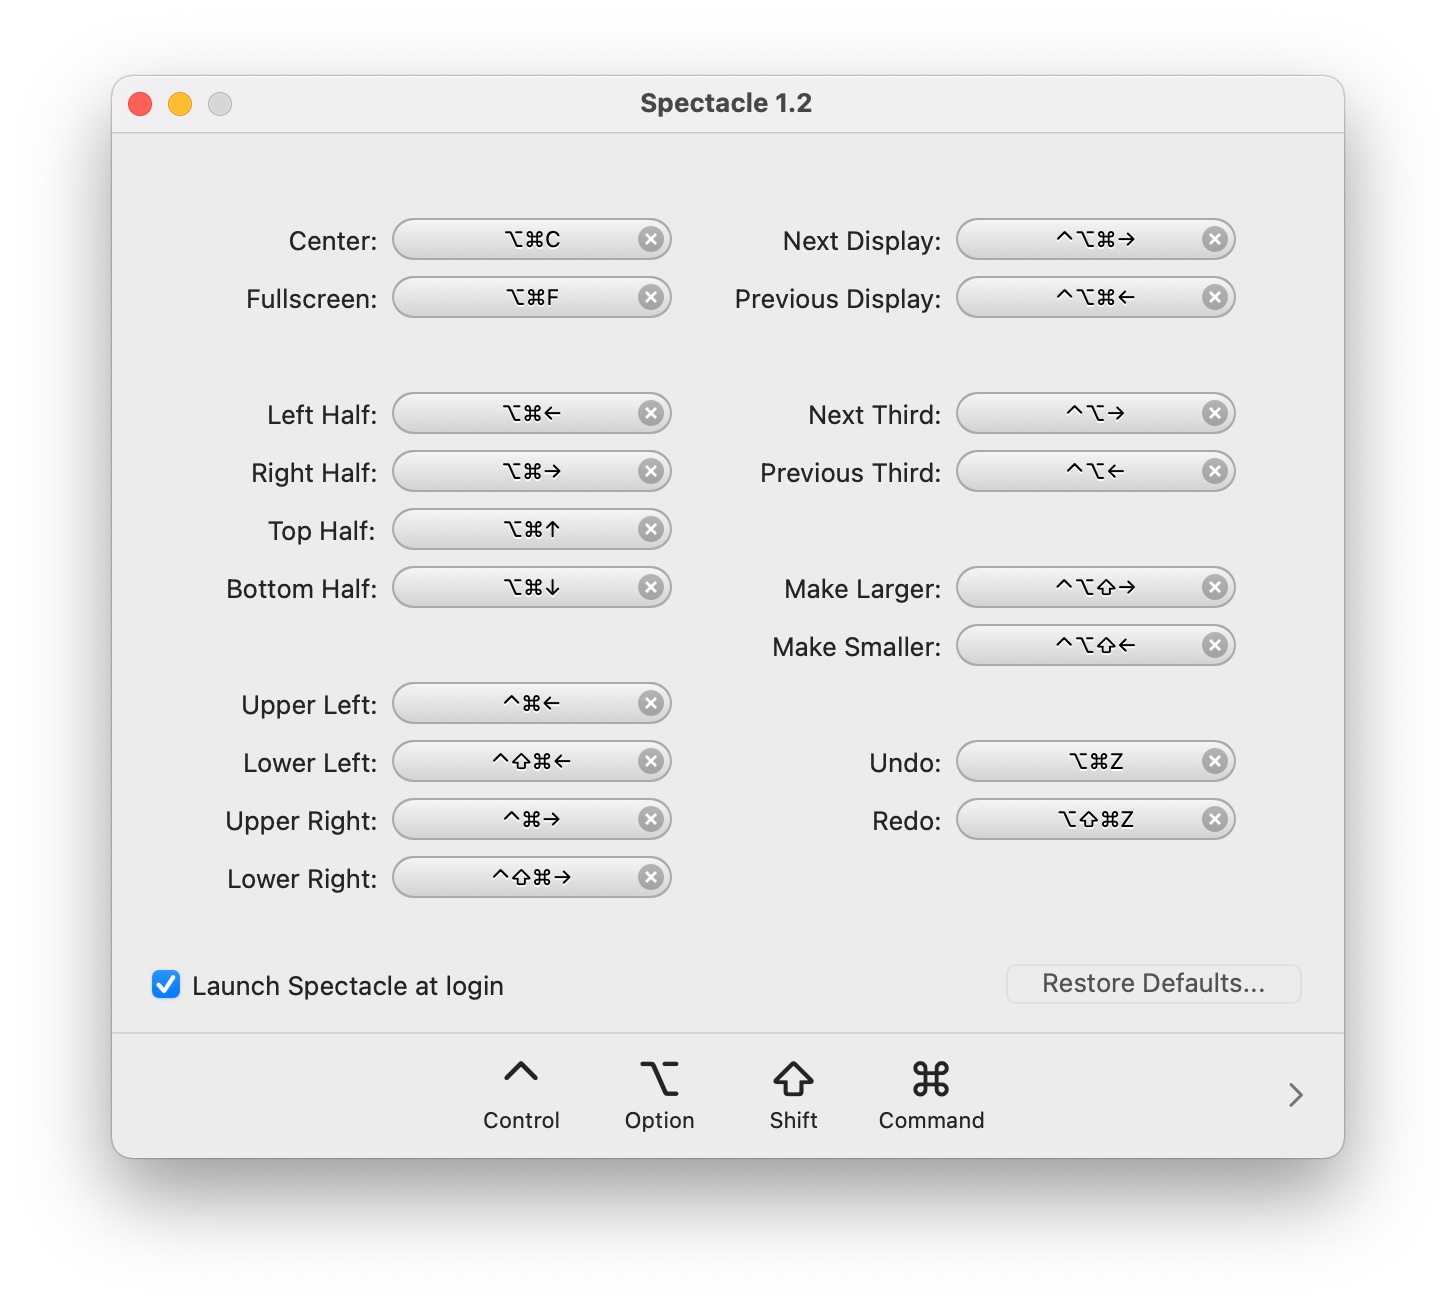
Windows machines do window management a lot better than Apple does out of the box. Luckily, there are applications like Spectacle.
When working on larger or multiple monitors, arranging your windows as wished can be a tiring process, but with "Spectacle" I can arrange 8 different windows on my two monitors in something like 10 seconds.
Also, a simple action like making an application go fullscreen or arranging two windows side by side is really easy with Spectacle.
Flux
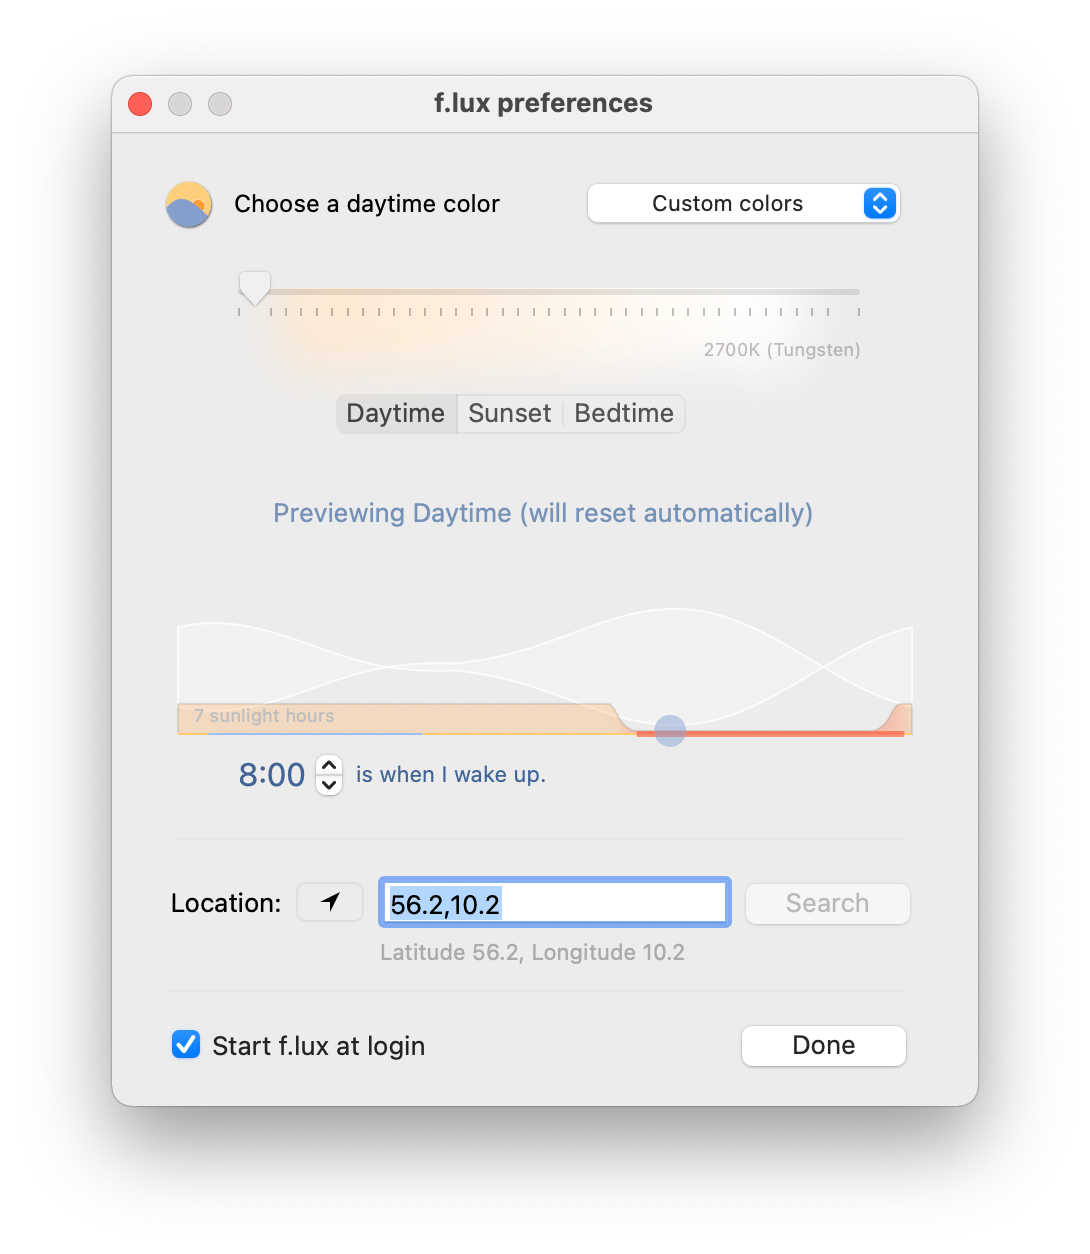
Flux ensures that my eyes aren’t exposed to any unnecessary blue light during early and late hours. I actually have my settings turned all the way up during the night and morning. Only if I do some graphical work do I turn it off for short periods of time, just to ensure that I’m not missing any weird colors.
Unsplash Wallpapers
Changing wallpapers is a tiring process if done manually. This small app does it automatically and grabs beautiful images from Unsplash. I’ve set mine to change daily and I really like it. New (virtual) view every day!
Visual Studio Code
Whenever I’m writing code, I usually use VS Code. I’ve used Atom and Sublime Text before, but the amount of extensions that VS Code provides just makes it an easier choice.
If you're new to customizing VS Code, start by reading Make VS Code Awesome.
It's an awesome walk-through of what you can do with the tool and whenever I reset my Mac, I remember how much I enjoy making those small tweaks and changes.
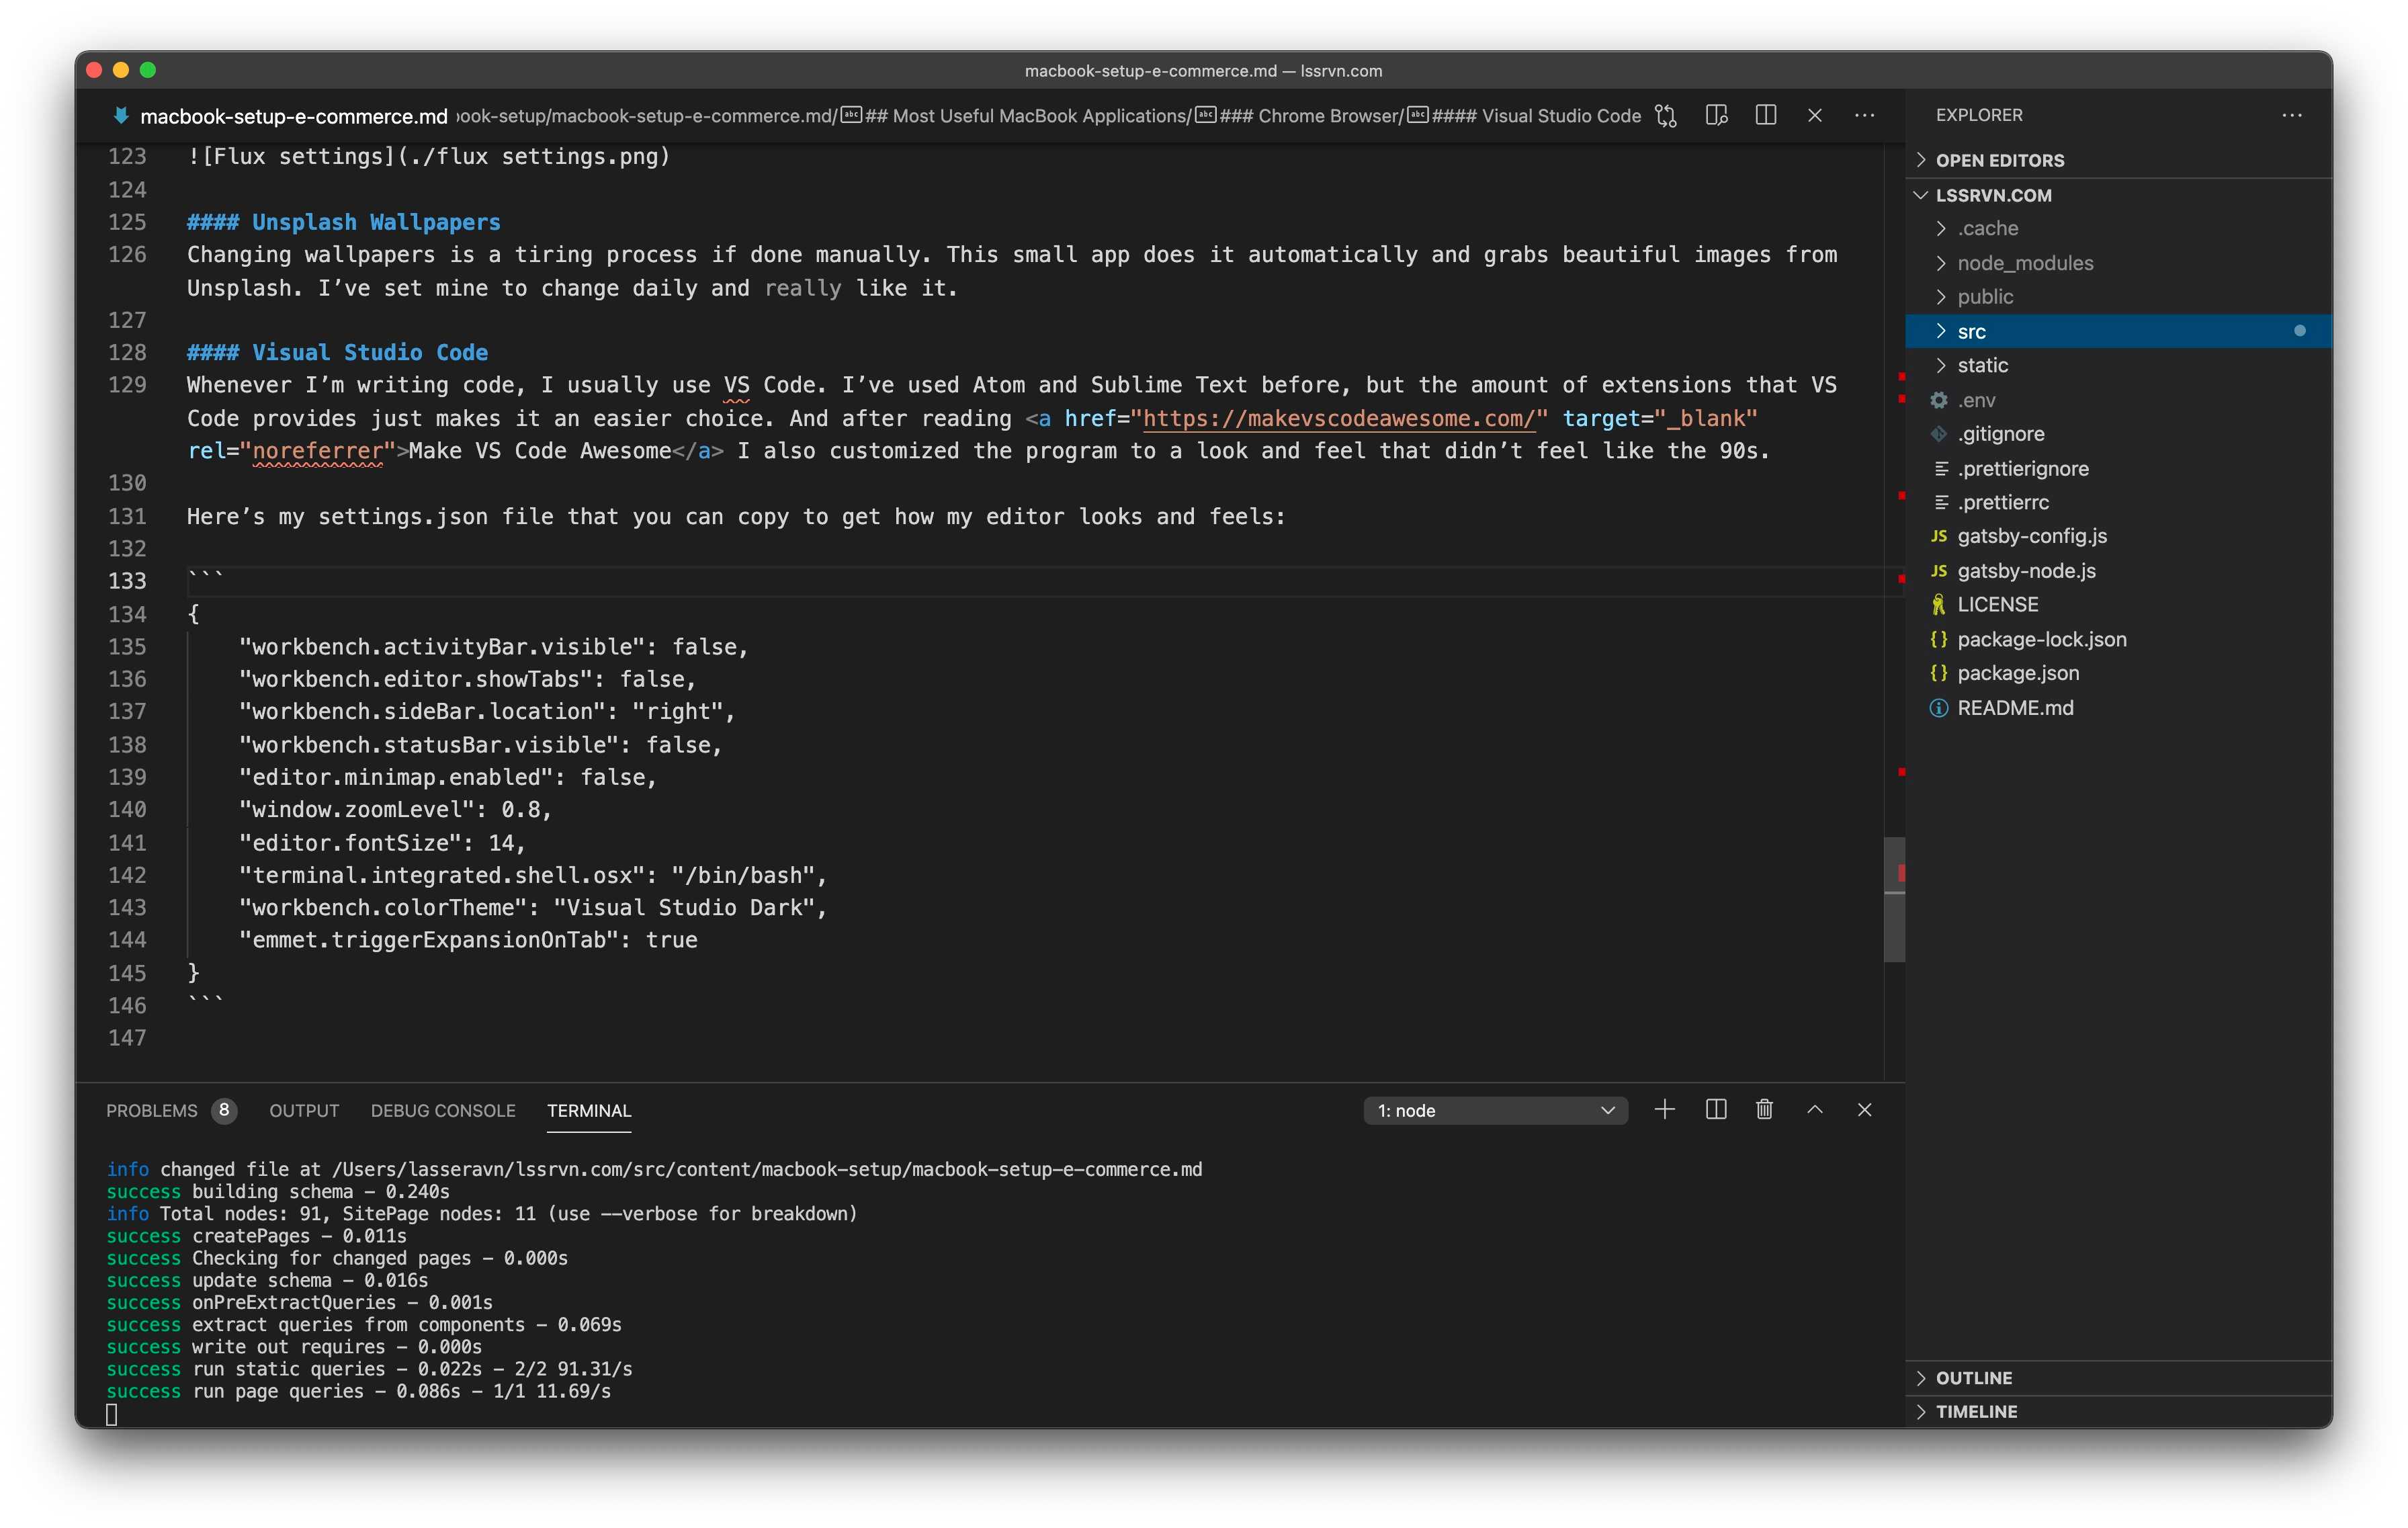
Here are some of my settings that you can copy to get how my editor looks and feels:
{
    "workbench.activityBar.visible": false,
    "workbench.editor.showTabs": false,
    "workbench.sideBar.location": "right",
    "workbench.statusBar.visible": false,
    "editor.minimap.enabled": false,
    "window.zoomLevel": 0.8,
    "editor.fontSize": 14,
    "terminal.integrated.shell.osx": "/bin/bash",
    "workbench.colorTheme": "Visual Studio Dark",
    "emmet.triggerExpansionOnTab": true
}