Apple and pretty much every single marketing platform are at war. Apple wants to improve privacy (at least for products that are not its own) and marketing platforms want to preserve their targeting abilities.
One of today’s largest technology consumer companies that are not reliant on running and serving ads is Apple. Although they do make money from ads through services like the App Store, it’s a far smaller revenue share than what Facebook makes from its ad platform.
So when a company, that owns the majority of smartphones within people’s pockets (at least here in Europe) announces how they aim to improve privacy and limit apps and websites’ tracking abilities, people listen.
Facebook’s response to Apple’s announcement was, among other things, their Facebook Conversions API. In short, a service that allows advertisers to send conversion information from server to server, instead of sending it from the visitor’s browser to the server.
In this short guide, I’ll show how e-commerce businesses using Shopify as their commerce platform can easily set up the Facebook Conversions API to track events like Purchases.
Traditionally, one would need a server environment to set up things like this, but luckily modern-day no-code tools have made these things much easier to set up for marketers and non-technical people.
Even if you’re handling a large volume of sales, this approach is still doable and easy to set up. Here’s what you’ll need to get started:
Facebook Events Manager access
Integromat account (recently changed name to "Make")
Shopify account with ‘store settings’ access
Here are the steps needed to set up the Facebook Conversions API with your Shopify store:
Generate Facebook API access token
Set up JSON payload event structure
Create Shopify webhook
Set up Integromat scenario
Let’s get started.
Generate Facebook API Access Token
Pop open the Facebook Events Manager and go to the "Implementations" tab on the far right. From here you’ll see the 6-step walkthrough of how to set up the Conversions API.
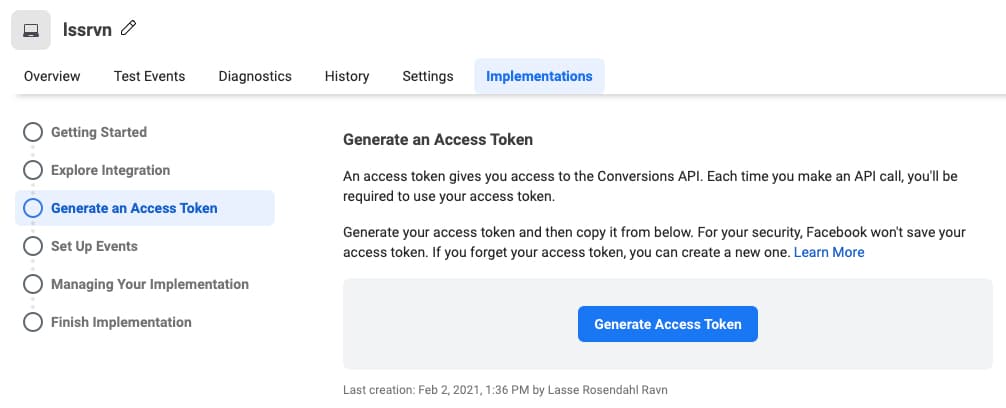
Scroll down to the "Generate Access Token" section and click the blue button to generate a token. The token works kind of like a keycard, which ensures that other people can’t send events through the API to your account. Don’t forget to save this in a note (that you can delete later) as you’ll be using this in a future step.
Set Up JSON Payload Event Structure
After creating and saving the token, you’re ready to set up your JSON payload for the purchase event we’re going to send to Facebook.
Lucky for you, I’ve done this beforehand, so you can just go ahead and copy my structure below.
{
	"data": [{
		"opt_out": false,
		"event_id": "",
		"user_data": {
			"ct": "",
			"em": "",
			"fn": "",
			"ln": "",
			"ph": "",
			"st": "",
			"zp": "",
			"fbc": null,
			"fbp": null,
			"country": "",
			"client_ip_address": "",
			"client_user_agent": ""
		},
		"event_name": "Purchase",
		"event_time": 1,
		"custom_data": {
			"value": 1,
			"currency": "",
			"content_ids": [""],
			"content_type": ""
		},
		"action_source": "",
		"event_source_url": ""
	}]
}
We’ll save this for now and use it in the last step.
Create Shopify Webhook
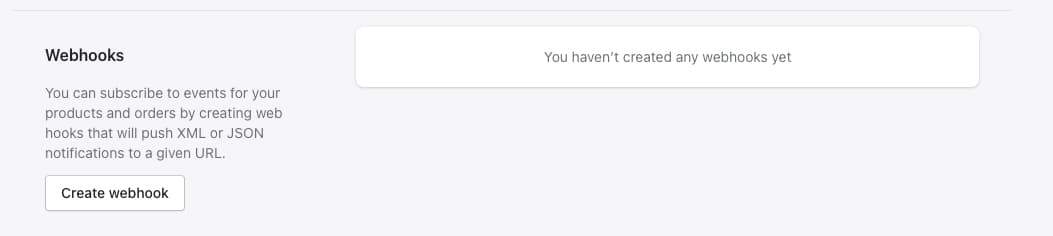
Next, we’ll move over to Shopify for a short setup over there. Open up your Settings page and find the "Notifications" item. Open that up and scroll all the way to the button until you see “Webhooks”.
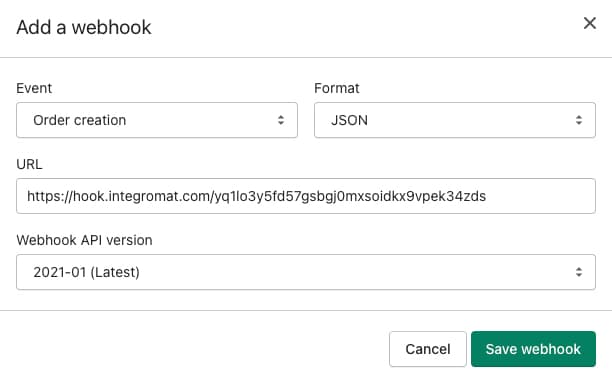
Click "Create webhook" and choose the event called "Order creation" from the dropdown menu. We’ll keep the JSON format. Now we’re asked for the URL and this is where we’ll open up a new tab to create an Integromat account.
Set Up Integromat Scenario
Creating an Integromat account takes about five seconds and once you’re done, head over to the “Scenarios” section from the menu. Click “Create a new scenario” in the top right corner and let’s get started with the automation.
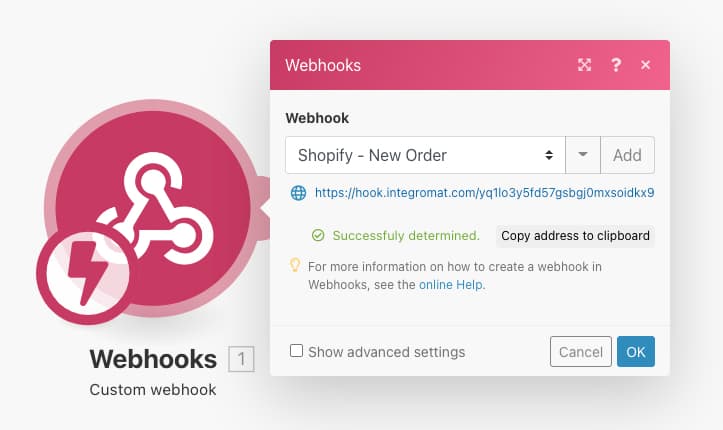
The first “module” to add to the scenario is the “Webhook” module. Choose the “Triggers when webhook receives data” option. This is what will catch the information sent from Shopify when a new order is created in your store.
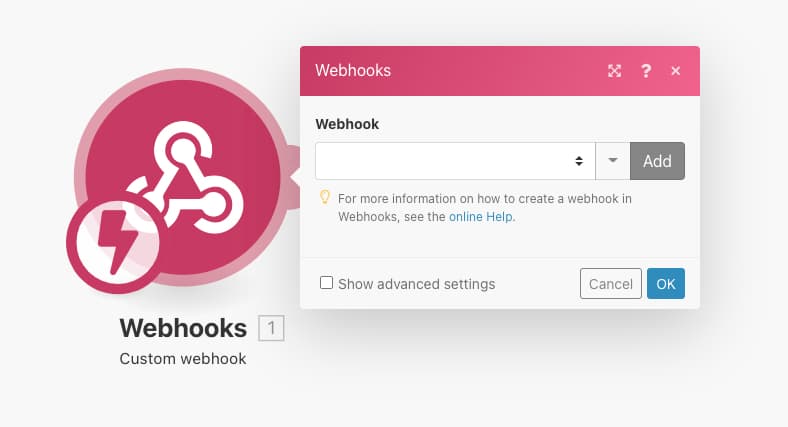
Since you haven’t set up any webhooks before, click the “Add” button to the right and add a new one. I’ll name mine “Shopify - New Order”.

Even if you have multiple stores, you can still use this naming convention as the same Integromat scenario can easily handle orders from multiple stores. It’s about thinking in lean and scalable setups here. Otherwise, things can get messy pretty quickly.
Click the “Copy address to clipboard” button and head back over to the Shopify webhook setup page. Paste in the link and click “Save webhook”.
Now that your webhook appears in the Webhooks list, scroll to the right and click “Send test notification”.
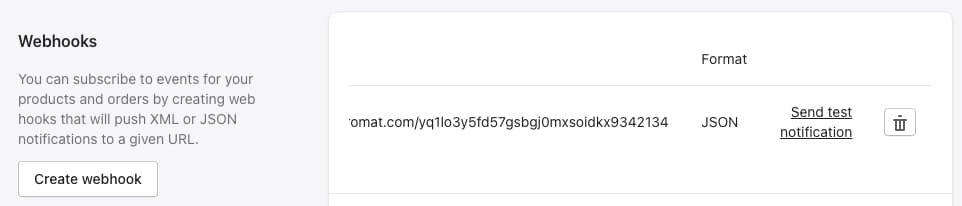
This will send a test order to your Integromat webhook module and allow us to continue the setup over there. If you see the “Successfully determined” message, this means that Integromat has read the webhook data and understood its structure.
If you’d like to see the actual test data, try right-clicking the webhooks module and click “Run this module only” and head back to Shopify to send the test notification again.
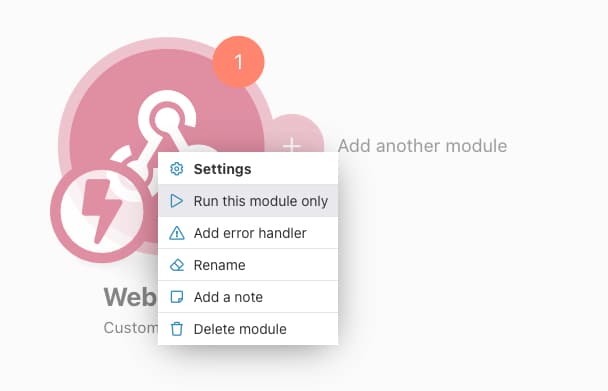
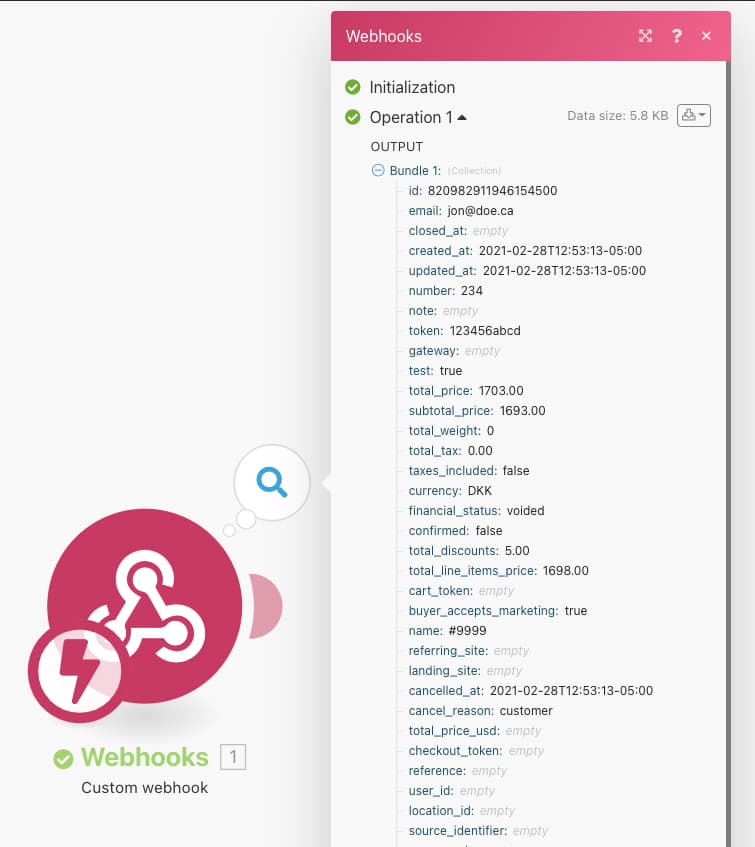
In Integromat, click the “1” icon on top of the module to inspect the data and the details from the test notification will show. Now we’ve loaded some test data into the automation and we can continue the setup.
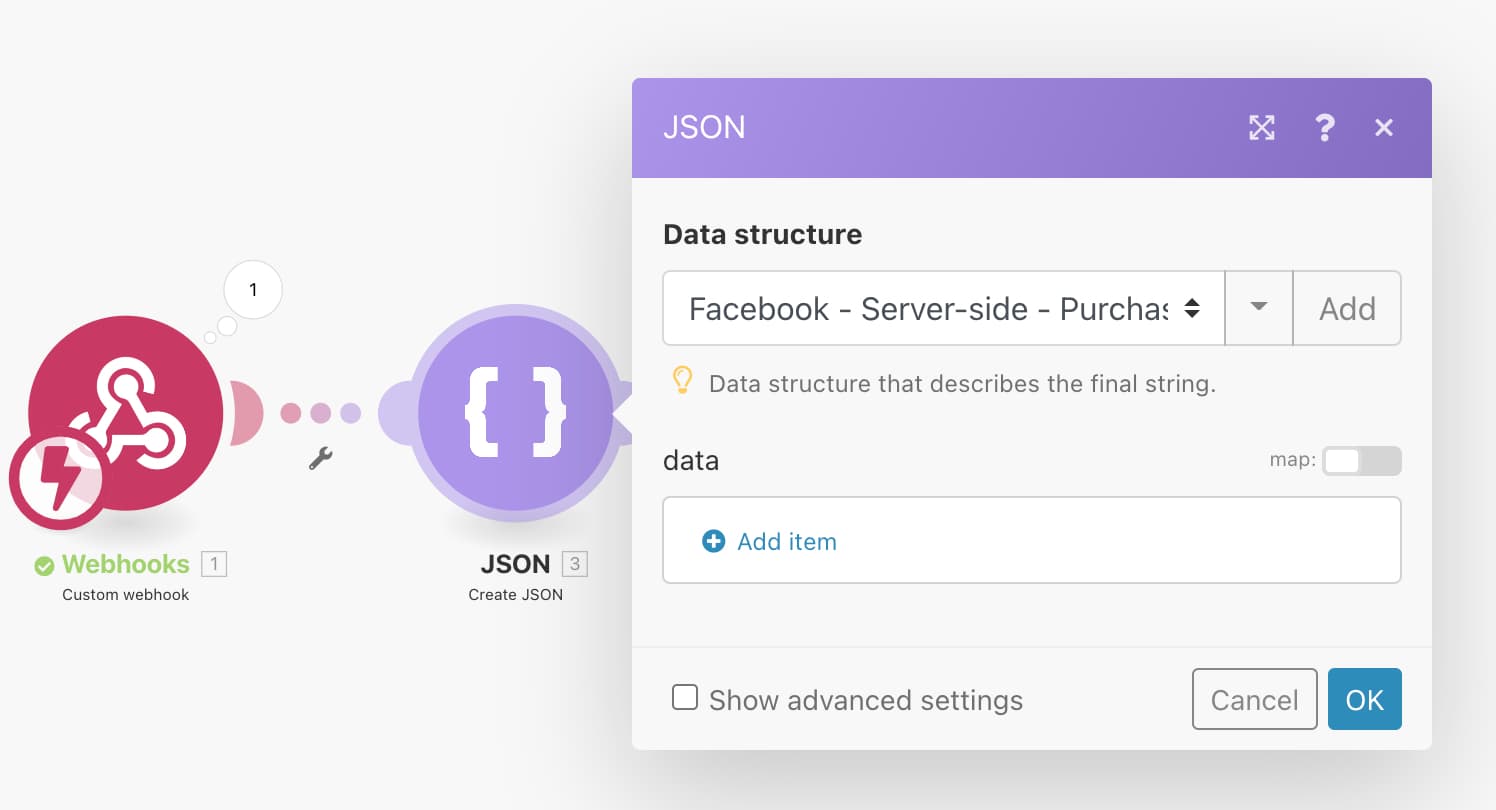
Click the side of the webhook module to add the next module to this scenario. Search for “JSON” and select the “Create JSON” option.

You’ll be asked to choose a data structure but since you haven’t added any yet, click “Add”, name it something like “Facebook - Server-side - Purchase” and hit the “Generator" button.
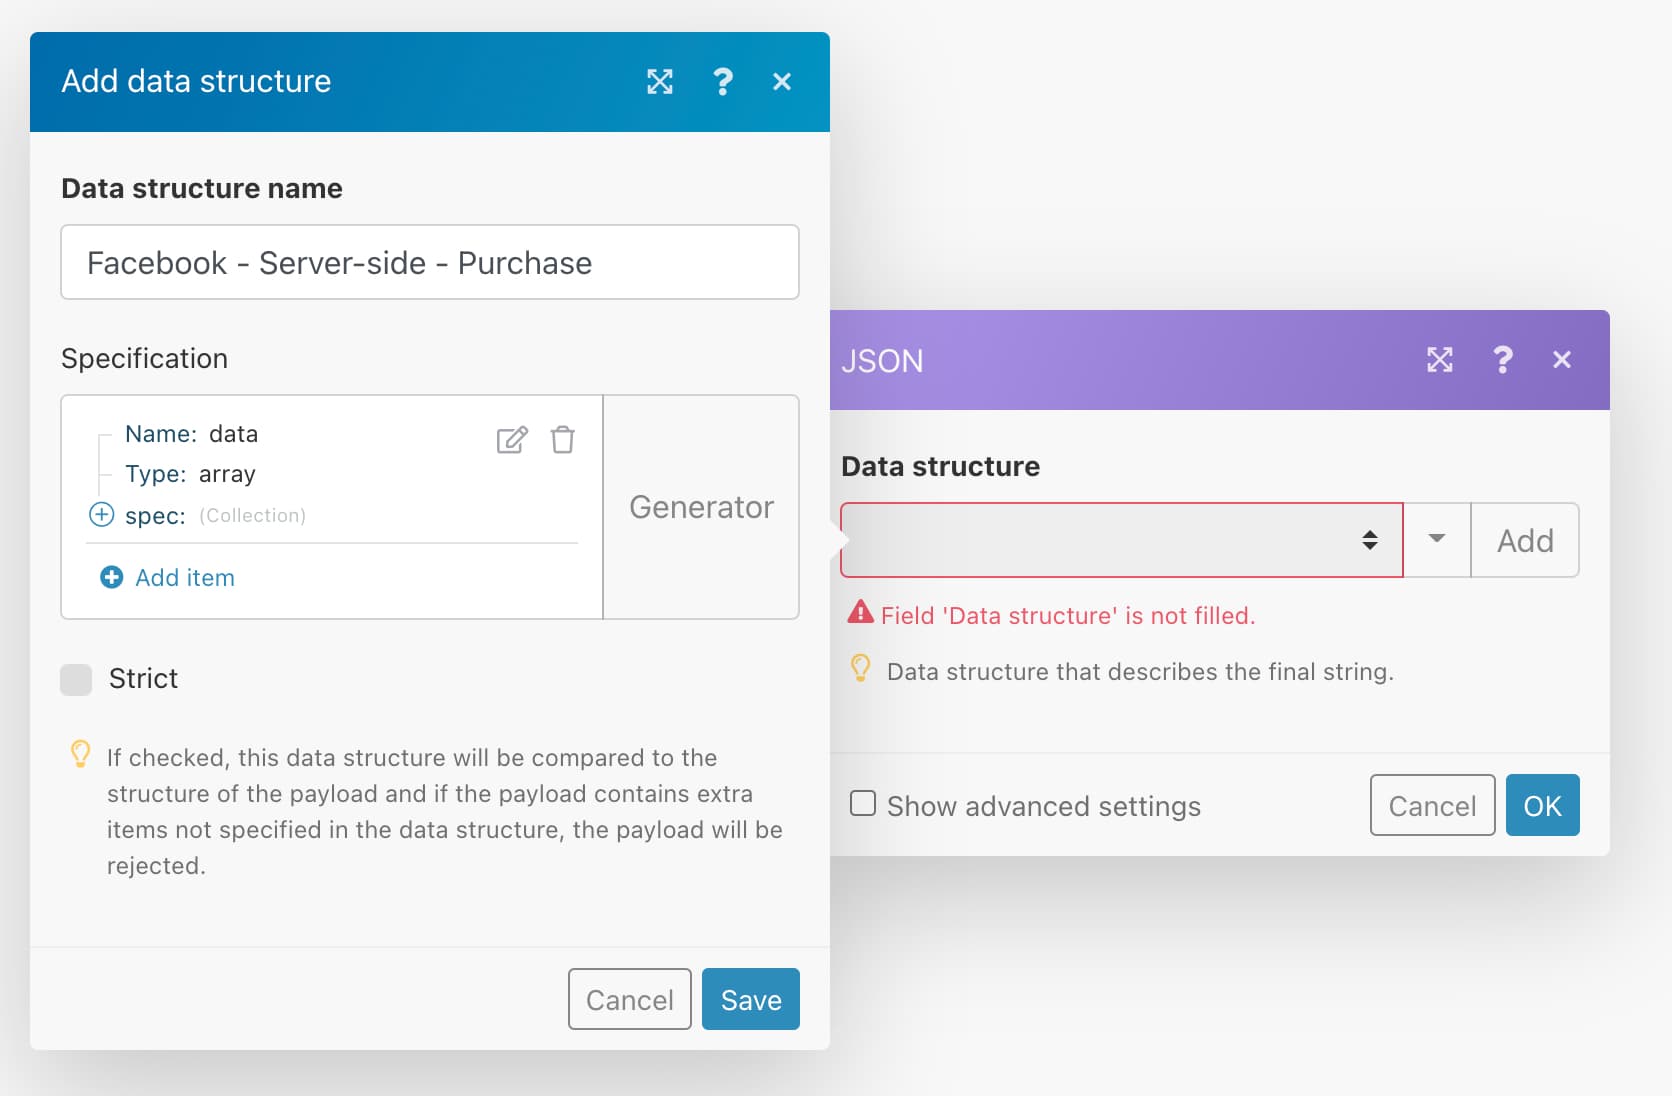
Now we’ll go back to our previous section about the JSON payload and copy what I showed you there. Pasting that into the generator will tell Integromat what information we’d like to send with our event.
After doing so, you’ll have the option to “Add item” to the data object. Go ahead and click that. This will open the object and allow you to map different values to the ones we’re sending to Facebook.
This Facebook overview shows you exactly what values we can send to the Facebook servers.
As you’ll see in the table, some of the values must be “hashed” when sent to Facebook. This is easily done in Integromat by putting the values inside the “sha256” function. Because the webhook data structure is the same across stores, you can copy+paste the things I paste below and insert those into your own setup, item by item. I've outputted them combined here:
event_id: {{1.id}}
ct: {{sha256(ifempty(1.customer.default_address.city; 1.shipping_address.city))}}
em: {{sha256(1.email)}}
fn: {{sha256(lower(1.customer.first_name))}}
ln: {{sha256(lower(1.customer.last_name))}}
ph: {{sha256(replace(1.phone; """+"""; ""))}}
st: {{sha256(lower(1.customer.default_address.province))}}
zp: {{sha256(1.customer.default_address.zip)}}
country: {{sha256(lower(1.customer.default_address.country))}}
client_ip_address: {{1.client_details.browser_ip}}
client_user_agent: {{1.client_details.user_agent}}
event_name: Purchase
event_time: {{formatDate(1.created_at; "X")}}
custom_data: value: {{1.total_price}}
custom data: currency: {{1.currency}}
custom data: content_ids: {{map(1.line_items; "id")}}
custom data: content_type: product_group
action_source: website
event_source_url: {{1.order_status_url}}
For example, you would copy the text in curly braces after "ct" and copy that into the "ct" field in Integromat:
{{sha256(ifempty(1.customer.default_address.city; 1.shipping_address.city))}}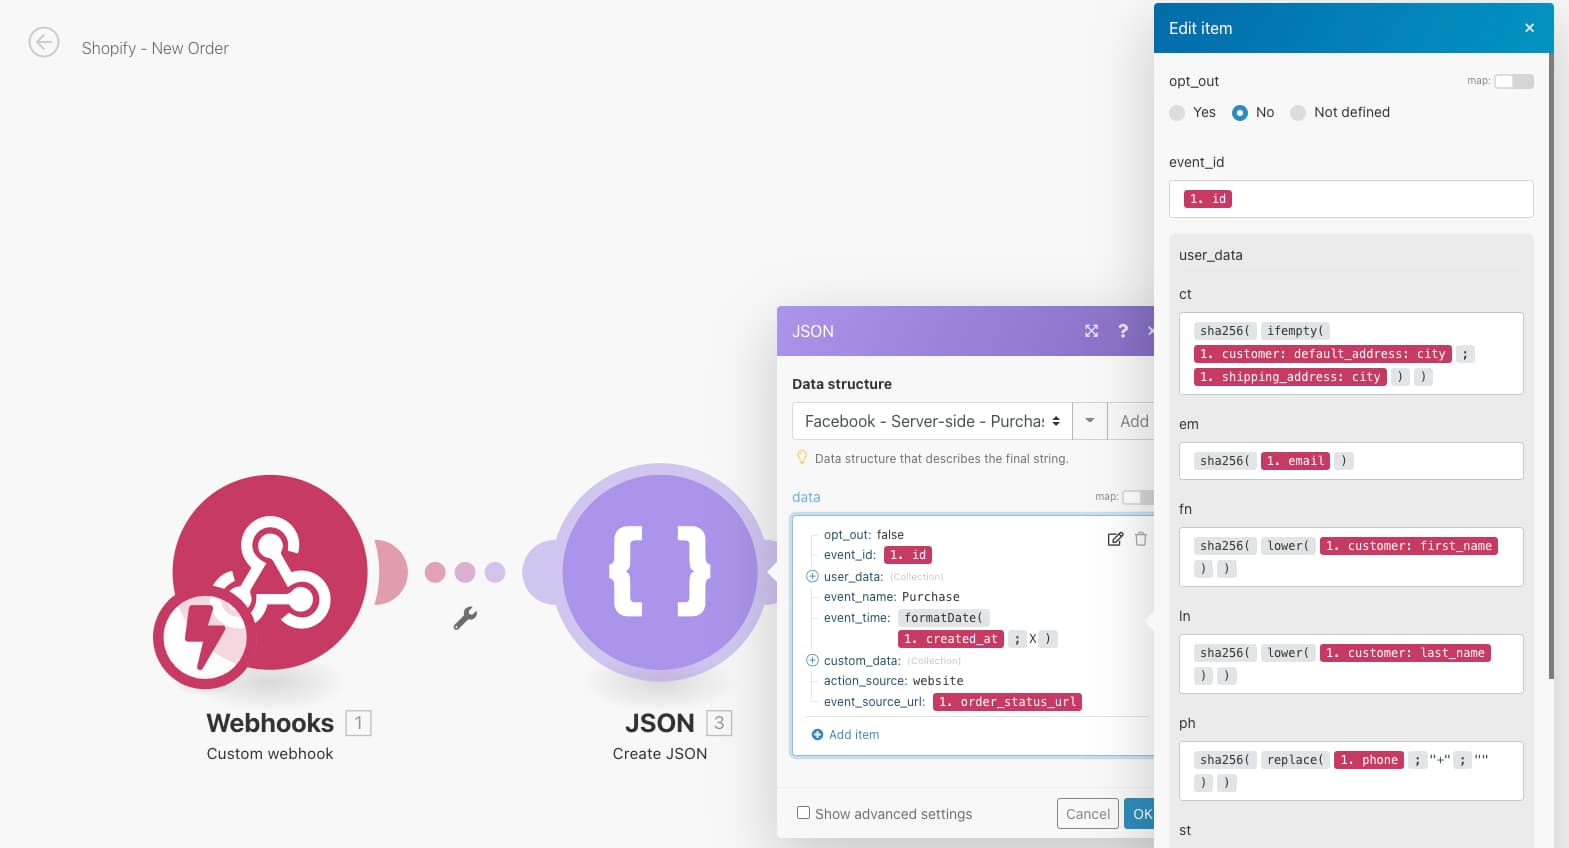
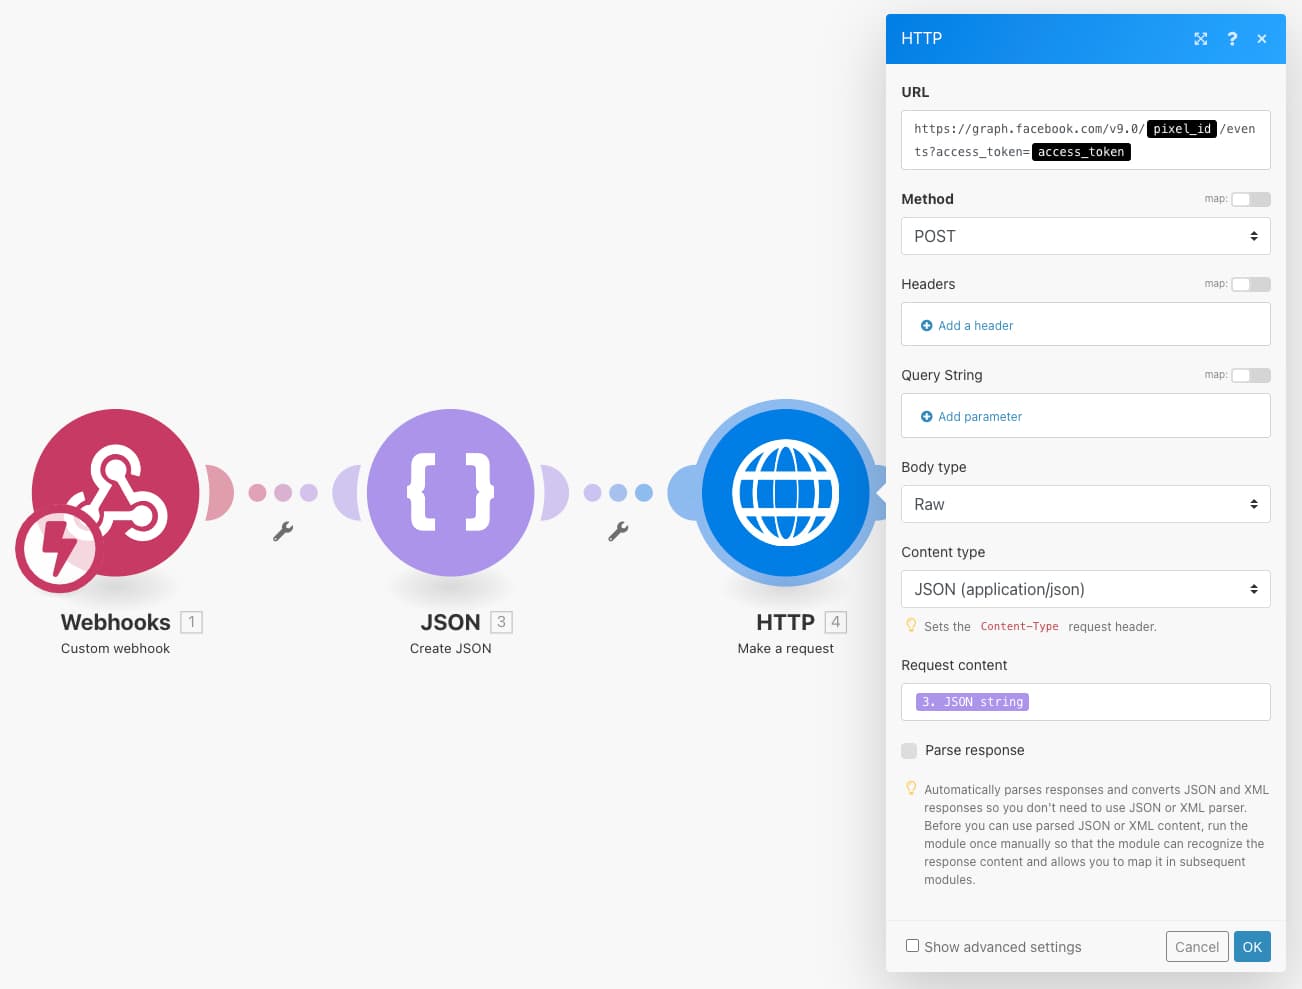
After adding those variables, we’re ready to add the next module to the scenario. This will be the “HTTP” module with the “Make request” action.
Here we’ll make a POST request to the Facebook server endpoint that registers these events. We’ll specify our Pixel ID and access token in the URL which is what grants us access.
https://graph.facebook.com/v9.0/{{your_pixel_ID}}/events?access_token={{your_access_token}}
Down below we’ll choose the Body type as “Raw” and Content type as “JSON (application/json)”. And finally, we’ll pass the JSON string from the previous module into the “Request content” field.
Remember to save your scenario. We don’t want to risk deleting any progress at this point. After doing so, there’s only one thing left to. Turn on the scenario in the bottom left corner and wait for purchases to come through.
You could try sending an additional test notification from Shopify to ensure everything is going through as it should.
From here, all your purchases should be going through. In case you’d like to triple-check, pop open the HTTP module again and check the “Show advanced settings” at the bottom, and then check the “Evaluate all states as errors” at the top.
Checking this will notify you in cases where Facebook servers return an error when you’re submitting your event via the API. Integromat will email you and future purchase events will be queued until you’ve fixed the error.
Important note on deduplication of events
Facebook recommends that you keep both your server-side event tracking as well as your pixel event tracking. Doing so will result in duplicated events… unless you account for this.
At the top of our JSON event object, we included the “event_id” variable. This would normally be the order id. This should also be passed to the pixel tracking if not done already.
The important thing to note here is that it shouldn’t be called event_id like with the server events. With pixel tracking, it’s called “eventID”. I know, confusing. But very important.
The very basic pixel implementation of the purchase event would therefore be modified to look something like this:
fbq('track', 'Purchase', {value: 12, currency: 'USD'}, {eventID: 'EVENT_ID'});Where you should replace 'EVENT_ID' with the order id from Shopify. Facebook will then compare events from the two sources and deduplicate those who have matching ids.
Facebook will warn you in the events manager if you have events that are duplicated, as well as if you’ve not set it up correctly. As I’m writing this, there are quite limited resources from Facebook about this, but hopefully, they’ll improve on this soon.
You can read more about the deduplication of events here: https://developers.facebook.com/docs/marketing-api/conversions-api/deduplicate-pixel-and-server-events.